Embark on a journey to transform your Java applications from monolithic structures to agile, scalable, and easily deployable entities using Docker. This guide will illuminate the path to containerization, offering a clear and concise understanding of how Docker revolutionizes application development and deployment. Discover how Docker’s containerization technology provides isolation, portability, and efficiency, allowing you to build, ship, and run Java applications seamlessly across different environments.
We’ll explore the fundamental concepts, from the benefits of containerization and Docker’s role to the practical steps of creating Dockerfiles, building images, and running containers. This guide will equip you with the knowledge to manage dependencies, handle volumes, and network your containers, as well as delve into advanced topics such as Docker Compose and container orchestration. Prepare to unlock the full potential of your Java applications with the power of Docker.
Introduction to Containerization and Docker
Containerization has revolutionized software development and deployment, offering a more efficient and portable way to package and run applications. Docker, a leading platform in this space, provides the tools and infrastructure to build, ship, and run applications in containers. This section will explore the fundamental concepts of containerization and Docker, emphasizing the benefits for Java applications and the advantages over traditional virtual machines.
Benefits of Containerizing a Java Application
Containerizing a Java application offers several advantages, streamlining the development lifecycle and improving operational efficiency. These benefits stem from the core principles of containerization, which focus on isolation, portability, and resource efficiency.
- Improved Portability: Containers package the application and its dependencies into a single unit, ensuring that the application runs consistently across different environments, from development laptops to production servers. This eliminates the “it works on my machine” problem.
- Resource Efficiency: Containers share the host operating system’s kernel, making them more lightweight than virtual machines. This allows you to run more applications on the same hardware, reducing infrastructure costs.
- Faster Deployment: Containers can be spun up and down quickly, enabling faster deployment cycles and quicker responses to changing business needs. This agility is crucial for modern software development practices.
- Simplified Dependency Management: Containers isolate applications and their dependencies, preventing conflicts between different applications. This makes it easier to manage complex software stacks and ensure that each application has the correct version of its dependencies.
- Enhanced Scalability: Containers can be easily scaled up or down based on demand. Container orchestration platforms like Kubernetes automate this process, allowing for dynamic resource allocation.
Docker’s Role in Containerization
Docker is a platform that simplifies the creation, deployment, and management of containers. It provides a user-friendly interface for building container images, running containers, and managing containerized applications.
Docker’s history dates back to 2013, when it was first released as an open-source project. It quickly gained popularity due to its ease of use and the benefits of containerization. Docker has since become the industry standard for containerization, with a large and active community supporting its development and use.
Docker works by using a container engine, which is responsible for creating and managing containers. The Docker engine uses a layered file system, where each layer represents a change to the base image. This allows for efficient storage and sharing of container images.
Advantages of Using Containers Over Virtual Machines
Containers offer several advantages over virtual machines, primarily in terms of resource utilization, deployment speed, and portability.
Virtual machines (VMs) provide a complete operating system environment for each application, leading to higher overhead. Containers, on the other hand, share the host operating system’s kernel, making them more lightweight and efficient.
- Lightweight Nature: Containers are significantly smaller and faster to start than VMs. VMs require a full operating system boot, while containers start almost instantly.
- Reduced Resource Consumption: Containers consume fewer resources (CPU, memory, disk space) than VMs. This allows for higher server density and reduced infrastructure costs.
- Faster Deployment and Scalability: Containers can be deployed and scaled much faster than VMs. This enables rapid iteration and faster response to changing demands.
- Simplified Management: Managing containers is often easier than managing VMs, especially when using container orchestration platforms.
While VMs still have their place, particularly for applications that require a full operating system or strong isolation, containers have become the preferred choice for many modern applications due to their efficiency, portability, and ease of management.
Prerequisites for Containerizing a Java Application
Before embarking on the journey of containerizing a Java application with Docker, it’s crucial to establish a solid foundation. This involves ensuring the necessary tools and software are installed and that your system meets the minimum requirements for Docker to function correctly. This section Artikels the prerequisites, covering the required software, system specifications, and installation procedures for various operating systems.
Required Tools and Software
To successfully containerize a Java application, several essential tools and software components are needed. These tools facilitate the development, building, and deployment processes.
- Java Development Kit (JDK): The JDK is essential for compiling and running Java code. You’ll need a compatible version of the JDK installed on your system. The specific version depends on your application’s requirements, but ensure it is compatible with the Java version your application uses. For example, if your application is built with Java 17, you should have JDK 17 installed.
- Docker: Docker is the core technology for containerization. It enables you to package your application and its dependencies into a container. Docker provides a platform for building, shipping, and running containers.
- A Text Editor or IDE: A text editor or Integrated Development Environment (IDE) is necessary for writing and modifying your Java code and Dockerfiles. Popular choices include IntelliJ IDEA, Eclipse, VS Code, and others.
- A Build Tool (Maven or Gradle): Build tools like Maven or Gradle are commonly used to manage project dependencies and build Java applications. They automate the process of compiling code, running tests, and packaging the application into a distributable format (e.g., a JAR or WAR file).
System Requirements for Running Docker
Docker’s system requirements vary depending on the operating system. However, there are some general guidelines to keep in mind. Meeting these requirements is crucial for ensuring Docker operates correctly and efficiently.
- Operating System: Docker can run on various operating systems, including Linux, macOS, and Windows. However, the specific requirements differ for each platform.
- Hardware:
- CPU: A modern CPU with virtualization support (Intel VT-x or AMD-V) is generally recommended for optimal performance, especially on macOS and Windows.
- Memory: The amount of RAM required depends on the size and complexity of your containers and applications. A minimum of 4GB of RAM is recommended, but more may be needed for complex projects.
- Disk Space: Sufficient disk space is needed for storing Docker images, containers, and related data. The amount of space required depends on the size of your applications and the number of images you are using.
- Operating System Specifics:
- Linux: Docker is natively supported on Linux. The specific requirements depend on the Linux distribution, but generally, you’ll need a recent kernel version (e.g., 3.10 or later) and a systemd-based init system.
- macOS: Docker Desktop for macOS requires a recent version of macOS and an Intel or Apple silicon processor.
- Windows: Docker Desktop for Windows requires Windows 10 or later (64-bit) and an Intel processor with virtualization support enabled.
Installing Docker on Different Operating Systems
The installation process for Docker varies depending on the operating system. Detailed instructions for each operating system are provided below. Following these steps ensures a successful Docker installation.
- Linux:
- Update Package Repository: Update your system’s package repository to ensure you have the latest package information. For example, on Debian/Ubuntu, you can use the command:
sudo apt update. - Install Docker Engine: Install the Docker Engine using your distribution’s package manager. For Debian/Ubuntu, you can use the command:
sudo apt install docker.io. - Start Docker Service: Start the Docker service to enable Docker to run in the background. Use the command:
sudo systemctl start docker. - Verify Installation: Verify that Docker is installed correctly by running the “hello-world” container:
sudo docker run hello-world. If Docker is installed correctly, you should see a message indicating that the installation was successful.
- Update Package Repository: Update your system’s package repository to ensure you have the latest package information. For example, on Debian/Ubuntu, you can use the command:
- macOS:
- Download Docker Desktop: Download Docker Desktop for macOS from the official Docker website.
- Install Docker Desktop: Open the downloaded installer package and follow the on-screen instructions to install Docker Desktop. This typically involves dragging the Docker icon to the Applications folder.
- Start Docker Desktop: Launch Docker Desktop from the Applications folder.
- Verify Installation: Once Docker Desktop is running, you can verify the installation by running the “hello-world” container in the terminal:
docker run hello-world.
- Windows:
- Download Docker Desktop: Download Docker Desktop for Windows from the official Docker website.
- Install Docker Desktop: Run the downloaded installer and follow the on-screen instructions. Ensure that the “Use WSL 2 instead of Hyper-V” option is selected if available, as it generally offers better performance.
- Start Docker Desktop: After installation, Docker Desktop should start automatically. If not, launch it from the Start menu.
- Verify Installation: Verify the installation by running the “hello-world” container in the command prompt or PowerShell:
docker run hello-world.
Creating a Dockerfile for a Java Application
A Dockerfile is a text document that contains all the commands a user could call on the command line to assemble an image. It serves as a blueprint for building Docker images, automating the process and ensuring consistency across different environments. Understanding the structure and components of a Dockerfile is crucial for effectively containerizing Java applications.
Structure and Components of a Dockerfile
The structure of a Dockerfile is straightforward, consisting of a series of instructions, each starting with a followed by arguments. These instructions are executed in order, creating layers that build upon each other to form the final image.Here’s a breakdown of the essential components:
- FROM: Specifies the base image to use for the build. This is the starting point for your image, often a pre-built image containing an operating system and necessary tools. For Java applications, this is frequently an image containing a Java Runtime Environment (JRE) or Java Development Kit (JDK).
- WORKDIR: Sets the working directory within the container. All subsequent instructions are executed relative to this directory.
- COPY: Copies files or directories from the host machine into the container’s file system. This is used to include your application’s code, configuration files, and dependencies.
- RUN: Executes commands within the container. This is used to install software, compile code, or perform other build-time tasks.
- CMD: Specifies the default command to run when the container starts. This command can be overridden when the container is launched.
- EXPOSE: Declares which ports the container will listen on at runtime. This doesn’t publish the ports; it’s more of a documentation feature.
- ENV: Sets environment variables within the container. These variables can be used to configure your application.
- ARG: Defines variables that can be passed to the Docker build process. These are useful for customizing the build.
- ENTRYPOINT: Configures a container to run as an executable. The ENTRYPOINT, along with the CMD, defines how the application runs.
Dockerfile for a Simple “Hello, World!” Java Application
Let’s create a Dockerfile for a simple “Hello, World!” Java application. This example demonstrates the fundamental instructions required for containerizing a basic Java program.First, create a directory for your project and inside it, create a file named `HelloWorld.java` with the following content:“`javapublic class HelloWorld public static void main(String[] args) System.out.println(“Hello, World!”); “`Next, create a file named `Dockerfile` (without any extension) in the same directory with the following content:“`dockerfileFROM openjdk:17-jdk-slimWORKDIR /appCOPY HelloWorld.java .RUN javac HelloWorld.javaCMD [“java”, “HelloWorld”]“`Let’s break down this Dockerfile:
- FROM openjdk:17-jdk-slim: This line specifies the base image. We are using the official OpenJDK 17 JDK slim image, which provides a Java runtime environment. The “slim” variant is smaller, reducing the image size.
- WORKDIR /app: This sets the working directory inside the container to `/app`.
- COPY HelloWorld.java .: This copies the `HelloWorld.java` file from your local directory to the `/app` directory within the container.
- RUN javac HelloWorld.java: This compiles the Java code using the `javac` compiler.
- CMD [“java”, “HelloWorld”]: This specifies the command to execute when the container starts, running the compiled Java program.
To build the Docker image, navigate to the directory containing the `Dockerfile` and run the following command in your terminal:“`bashdocker build -t hello-java .“`This command builds an image tagged as `hello-java`. The `.` at the end specifies the build context (the current directory).Finally, run the container using:“`bashdocker run hello-java“`This will execute the “Hello, World!” Java application, and you should see “Hello, World!” printed to the console.
Dockerfile that Optimizes Image Size and Build Process, Using Multi-Stage Builds
Multi-stage builds are a powerful feature of Docker that significantly optimize image size and build time. They allow you to use multiple `FROM` instructions in a single Dockerfile, each representing a different stage of the build process. This allows you to separate build-time dependencies from runtime dependencies, resulting in a smaller final image.Here’s a Dockerfile for the “Hello, World!” application, optimized with multi-stage builds:“`dockerfile# Stage 1: Build the applicationFROM openjdk:17-jdk-slim AS builderWORKDIR /appCOPY HelloWorld.java .RUN javac HelloWorld.java# Stage 2: Create a runtime imageFROM openjdk:17-jre-slimWORKDIR /appCOPY –from=builder /app/HelloWorld.class .CMD [“java”, “HelloWorld”]“`Let’s analyze this optimized Dockerfile:
- Stage 1 (builder):
- `FROM openjdk:17-jdk-slim AS builder`: This line defines the first stage, named “builder,” using the OpenJDK 17 JDK slim image.
- `WORKDIR /app`: Sets the working directory.
- `COPY HelloWorld.java .`: Copies the source file.
- `RUN javac HelloWorld.java`: Compiles the Java code.
- Stage 2 (runtime):
- `FROM openjdk:17-jre-slim`: This defines the second stage, using the OpenJDK 17 JRE slim image. This image is smaller because it only includes the Java Runtime Environment, not the development tools like the JDK.
- `WORKDIR /app`: Sets the working directory.
- `COPY –from=builder /app/HelloWorld.class .`: This crucial line copies the compiled `HelloWorld.class` file from the “builder” stage to the current stage. This is how we transfer the compiled application to the runtime environment.
- `CMD [“java”, “HelloWorld”]`: Specifies the command to run the application.
The key benefit of this approach is that the final image only contains the necessary runtime components (JRE and the compiled class file), significantly reducing its size compared to including the entire JDK. The builder stage is used only to compile the code and is discarded after the build process.To build this multi-stage Dockerfile, use the same `docker build` command as before:“`bashdocker build -t hello-java-optimized .“`The resulting image, `hello-java-optimized`, will be much smaller than the image created using a single-stage Dockerfile with the full JDK.
This optimization is particularly important for complex Java applications with numerous dependencies. In a real-world scenario, a large enterprise application may have several gigabytes of dependencies; the reduction in image size will drastically improve deployment times and resource utilization. For instance, deploying a Java application with a single-stage build might take 10 minutes, while using multi-stage builds could reduce that to 2 minutes, improving efficiency.
Building a Docker Image
Building a Docker image is the crucial step that transforms your application and its dependencies into a portable, self-contained unit. This process utilizes the Dockerfile you created earlier to define the image’s structure and contents. Understanding the image building process and the various options available to you is essential for creating efficient and reliable containerized applications.
Building the Docker Image from a Dockerfile
The primary method for building a Docker image involves the `docker build` command. This command reads instructions from a Dockerfile and executes them sequentially, layer by layer. Each instruction in the Dockerfile contributes to a new layer in the image, and these layers are cached to optimize subsequent builds.To build an image, navigate to the directory containing your Dockerfile in your terminal.
Then, execute the following command:“`bashdocker build .“`This command instructs Docker to build an image using the Dockerfile in the current directory (indicated by the “.”). Docker will then:
- Parse the Dockerfile and identify each instruction.
- Execute each instruction, creating a new layer in the image.
- Cache layers to speed up subsequent builds if the Dockerfile hasn’t changed.
- Output build progress and any error messages to the console.
The build process can take some time, depending on the size of your application, the number of dependencies, and the complexity of the Dockerfile.
Using Docker’s Build Context
The “build context” refers to the set of files and directories that Docker can access during the build process. This typically includes the directory where the Dockerfile resides and its contents. Docker sends the build context to the Docker daemon, which then performs the build.Understanding the build context is important because:
- Only files within the build context can be accessed by the `COPY` and `ADD` instructions in your Dockerfile.
- Including unnecessary files in the build context can increase the build time and image size.
- Using a `.dockerignore` file allows you to exclude specific files and directories from the build context.
To optimize the build process, it is a good practice to place the Dockerfile in the root of your project and use a `.dockerignore` file to exclude files that are not required for the application to run, such as `.git` directories, build artifacts, and temporary files.
Tagging and Naming the Docker Image
Tagging and naming your Docker image is a vital step for organization and version control. It allows you to easily identify and manage different versions of your image and share them with others.The `docker build` command can be used with the `-t` or `–tag` option to specify a name and tag for your image. The general format for tagging an image is:“`docker build -t
- Use a consistent naming convention for your images.
- Tag images with version numbers to track different releases.
- Use meaningful tags to indicate the purpose or environment of the image (e.g., `dev`, `staging`, `production`).
- Use the `latest` tag with caution, as it can be ambiguous and may not reflect a specific version.
Proper tagging is essential for managing your images effectively and ensuring reproducibility and ease of deployment.
Running a Java Application in a Docker Container

Now that a Docker image has been created, the next step is to run a container from it. This involves starting an isolated instance of the application, allowing interaction with the Java application. This section details the process of launching a container, managing its resources, and accessing the application within.
Running a Docker Container from an Image
Running a container involves using the `docker run` command, followed by the image name and any necessary options. The command creates a container from the image and executes the application defined in the image.The basic syntax for running a container is:“`bashdocker run [OPTIONS] IMAGE [COMMAND] [ARG…]“`
`docker run`
This is the primary command to create and run a container.
`[OPTIONS]`
This allows for configuration of the container’s behavior. Options include port mappings, volume mounts, environment variables, and resource limits.
`IMAGE`
Specifies the name of the Docker image to use.
`[COMMAND]`
This is an optional command to override the default command defined in the Dockerfile.
`[ARG…]`
Arguments for the command.For instance, to run a container from an image named `my-java-app`, you would use the following command, assuming the application starts automatically when the container runs:“`bashdocker run my-java-app“`This command creates a container based on the `my-java-app` image and starts the application inside it. The container will run in the foreground, and you can view its output in the terminal.
To run the container in the background, use the `-d` option.“`bashdocker run -d my-java-app“`Running in the background detaches the container from the terminal, and the container ID is displayed. This allows you to continue using the terminal while the container runs. To view the logs of a detached container, use `docker logs
Exposing Ports and Mapping Volumes
Exposing ports and mapping volumes are crucial for interacting with the application and managing its data. Port exposure enables access to the application from outside the container, and volume mapping allows for persistent data storage and sharing between the host machine and the container.To expose ports, the `-p` or `–publish` option is used with the `docker run` command. This maps ports on the host machine to ports inside the container.* `-p host_port:container_port`: Maps a specific port on the host machine to a port inside the container.For example, if the Java application listens on port 8080 inside the container, and you want to access it from your host machine on port 8080, you would use:“`bashdocker run -p 8080:8080 my-java-app“`This command forwards traffic from port 8080 on the host to port 8080 within the container.To map volumes, the `-v` or `–volume` option is used.
This option allows you to mount a directory from the host machine into the container, providing persistent storage.* `-v host_directory:container_directory`: Mounts the host directory to the container directory.For example, to map a directory named `data` on your host machine to the `/app/data` directory inside the container, you would use:“`bashdocker run -v /path/to/data:/app/data my-java-app“`This command ensures that any data written to `/app/data` inside the container is also written to the `/path/to/data` directory on the host machine, providing data persistence and allowing for easy data access and modification.
Accessing the Java Application Running Inside the Container
After running the container and exposing the necessary ports, accessing the Java application involves using the host machine’s IP address or hostname and the exposed port.If the container is running on the same machine as the Docker daemon, you can access the application using `localhost` or `127.0.0.1` and the exposed port.For example, if you exposed port 8080, you would access the application by opening a web browser and navigating to `http://localhost:8080` or `http://127.0.0.1:8080`.If the container is running on a remote server, you would use the server’s public IP address or domain name and the exposed port.For example, if the server’s IP address is `192.168.1.100` and you exposed port 8080, you would access the application by navigating to `http://192.168.1.100:8080`.The specific access method depends on the application’s functionality and the configuration of the Docker container.
For applications that provide a web interface, accessing the application through a web browser is typically straightforward. For applications that expose an API, you would use tools like `curl`, `Postman`, or any other API client to interact with the application. The key is to ensure that the ports are correctly exposed and that the host machine can reach the container.
Containerizing a Java Application with Maven or Gradle
Integrating Docker into your Java application build process streamlines the creation of container images, automating a crucial step in deployment. Using build tools like Maven or Gradle, which are fundamental to Java development, allows you to define the image build process within your project’s configuration. This ensures that the Docker image is built consistently every time you build your application, aligning perfectly with the principles of continuous integration and continuous delivery (CI/CD).
This integration significantly simplifies deployment and reduces the potential for errors, making the development cycle more efficient and reliable.
Integrating Docker with Maven or Gradle Build Processes
Integrating Docker with Maven or Gradle leverages plugins designed specifically for this purpose. These plugins extend the capabilities of the build tools, enabling them to build Docker images as part of the standard build lifecycle. This integration provides a seamless and automated approach to containerization.
- Maven Integration: The `dockerfile-maven-plugin` is a popular choice for Maven projects. This plugin allows you to define the Dockerfile directly within your `pom.xml` file, specifying the base image, application dependencies, and the commands to run your application. The plugin then handles the image building process.
- Gradle Integration: For Gradle, the `com.palantir.docker-compose` or the `com.bmuschko.docker-remote-api` plugins can be used. These plugins provide similar functionality to the Maven plugin, allowing you to configure Docker image builds and interact with the Docker daemon. They offer flexible configuration options, including support for building images from a Dockerfile or directly from Gradle tasks.
- Benefits of Integration:
- Automation: Docker image creation becomes part of your build process, eliminating manual steps.
- Consistency: Builds are repeatable and consistent across different environments.
- Version Control: Dockerfile configurations are stored in your project’s repository, allowing for versioning and collaboration.
- CI/CD Compatibility: Seamless integration with CI/CD pipelines for automated build, test, and deployment.
Maven or Gradle Configurations for Building Docker Images
Configuring Maven or Gradle to build Docker images involves adding the appropriate plugin and defining the image build parameters within your project’s build configuration file. The specific configuration details will vary based on the chosen plugin, but the fundamental principles remain the same.
- Maven Configuration Example (using `dockerfile-maven-plugin`):
In your `pom.xml` file, you would include the plugin within the `
` section. The configuration would specify the Dockerfile location, the image name, and any other relevant build parameters. Example snippet:
<plugin> <groupId>com.spotify</groupId> <artifactId>dockerfile-maven-plugin</artifactId> <version>1.4.13</version> <executions> <execution> <id>default</id> <goals> <goal>build</goal> <goal>push</goal> </goals> </execution> </executions> <configuration> <repository>your-docker-hub-username/your-image-name</repository> <tag>latest</tag> <buildArgs> <JAR_FILE>target/$project.build.finalName.jar</JAR_FILE> </buildArgs> </configuration> </plugin>
This configuration defines the plugin, the image repository and tag, and includes the JAR file to be copied into the image.
The `buildArgs` section allows for passing variables to the Dockerfile.
- Gradle Configuration Example (using `com.palantir.docker-compose`):
In your `build.gradle` file, you would apply the plugin and configure the Docker image build task. This might involve specifying the Dockerfile location, the image name, and the source files to include.
Example snippet:
plugins id 'com.palantir.docker-compose' version '0.35.0' dockerCompose projectName = 'your-project-name' docker name = "your-docker-hub-username/your-image-name" files = ["build/libs/$project.name-$project.version.jar"] dockerfile = file('src/main/docker/Dockerfile')This example configures the `docker` task, specifying the image name, the JAR file to include, and the Dockerfile location.
The `dockerCompose` section configures the project name for Docker Compose.
- Dockerfile Location: The Dockerfile location is specified within the plugin configuration. The plugin uses this Dockerfile to build the image.
- Image Name and Tag: Defining the image name and tag allows you to identify and version your images. Use a consistent naming convention for easier management.
- Build Arguments: Build arguments can be passed to the Dockerfile during the build process. This allows for customization of the image based on the environment or specific build requirements.
Automating the Build and Deployment of a Java Application using Docker and a Build Tool
Automating the build and deployment process involves integrating the Docker image build step into your CI/CD pipeline. This can be achieved by configuring your build tool to build the Docker image, push it to a container registry, and then deploying the application to your target environment.
- Build Automation Steps:
- Code Changes: Developers commit code changes to the version control system (e.g., Git).
- Build Trigger: The CI/CD pipeline is triggered by a commit or a scheduled event.
- Code Compilation: The build tool (Maven or Gradle) compiles the Java code.
- Dependency Management: Dependencies are resolved and downloaded.
- Docker Image Build: The build tool executes the Docker plugin to build the Docker image.
- Image Tagging: The Docker image is tagged with a version number or a commit hash.
- Image Push: The Docker image is pushed to a container registry (e.g., Docker Hub, Amazon ECR, Google Container Registry).
- Deployment: The CI/CD pipeline deploys the application to the target environment (e.g., Kubernetes, Docker Swarm).
- Example CI/CD Configuration (using Jenkins):
In Jenkins, you would create a job that defines the build pipeline. This job would include steps for checking out the code, building the application with Maven or Gradle, building the Docker image using the appropriate plugin, pushing the image to a registry, and deploying the application to a target environment.
Example Jenkinsfile snippet:
pipeline agent any stages stage('Build') steps sh 'mvn clean install' // or ./gradlew build stage('Docker Build') steps sh 'mvn dockerfile:build' // or ./gradlew dockerBuild' stage('Docker Push') steps sh 'docker push your-docker-hub-username/your-image-name:latest' stage('Deploy') steps // Deployment steps to your target environment (e.g., Kubernetes deployment)This Jenkinsfile defines the build stages, including build, Docker image build, Docker image push, and deploy.
The deployment step would vary based on the target environment.
- Benefits of Automation:
- Faster Releases: Automated builds and deployments significantly reduce the time to release new versions of your application.
- Reduced Errors: Automation minimizes manual errors and inconsistencies.
- Increased Efficiency: Development teams can focus on writing code rather than manual deployment tasks.
- Improved Reliability: Consistent and repeatable builds ensure the reliability of your application.
Managing Dependencies and Volumes
Managing dependencies and persistent data storage are crucial aspects of containerizing any application, including Java applications. Dependencies ensure that the application has all the necessary components to run correctly, while volumes provide a mechanism for data to survive the lifecycle of a container. This section explores how to handle dependencies effectively within a Docker container and demonstrates the practical application of volumes for persistent data storage.
Handling Dependencies Within a Docker Container
Managing dependencies is fundamental to the successful operation of any Java application deployed within a Docker container. The Dockerfile provides the framework for specifying and installing these dependencies. There are several approaches to ensure dependencies are correctly included.
- Using Package Managers: For system-level dependencies, package managers such as `apt` (Debian/Ubuntu) or `yum` (CentOS/RHEL) can be used within the Dockerfile. This involves updating the package index and then installing the required packages. For example:
FROM openjdk:17-jdk-slim RUN apt-get update && apt-get install -y --no-install-recommends [package_name]
- Leveraging Build Tools (Maven/Gradle): When using Maven or Gradle, the dependencies are typically managed through the `pom.xml` or `build.gradle` files, respectively. These build tools handle the downloading and management of project dependencies. When the application is built (using the Dockerfile’s build process), these dependencies are resolved and packaged within the application’s artifact (e.g., a JAR file). The Dockerfile then copies this artifact into the container.
This approach simplifies the dependency management process significantly.
- Dependency Caching: Docker’s layer caching mechanism is highly beneficial for managing dependencies. By placing dependency installation steps early in the Dockerfile, Docker can cache the results of those steps. If the dependencies haven’t changed, subsequent builds can reuse the cached layers, resulting in faster build times.
- Using Multi-Stage Builds: Multi-stage builds offer a powerful way to optimize the size of the final Docker image. In a multi-stage build, one stage is used to build the application and resolve dependencies, while a separate stage copies only the necessary artifacts (e.g., the JAR file) into the final image. This results in a smaller image size, as it doesn’t include the build tools or unnecessary dependencies.
Demonstrating the Use of Volumes for Persistent Data Storage
Volumes in Docker provide a way to persist data generated by and used by a container. This is critical for applications that require data to survive container restarts or even container deletion. Without volumes, data would be lost when the container is removed. Volumes can be managed by Docker directly, by the host machine, or by a third-party storage provider.
- Understanding Volume Types: Docker supports several volume types:
- Volumes: These are managed by Docker and are the preferred way to persist data. They reside in a part of the host filesystem that is managed by Docker.
- Bind Mounts: These allow you to mount a specific file or directory from the host machine into the container. While useful, they tie the data to the host machine, which can limit portability.
- tmpfs Mounts: These are temporary mounts that exist only in the container’s memory and are not persisted to disk.
- Declaring Volumes in the Dockerfile: You can declare volumes in the Dockerfile using the `VOLUME` instruction. This instruction does not initialize the volume but serves as documentation and a hint to Docker about where the container will store data.
- Mounting Volumes at Runtime: Volumes are typically mounted when you run the container using the `docker run` command and the `-v` or `–volume` flag.
Creating an Example That Illustrates Data Persistence Using Volumes
This example demonstrates how to create a simple Java application and persist its data using a Docker volume.
- Java Application (Simple Counter): Create a simple Java application that increments a counter and saves it to a file.
import java.io.BufferedReader; import java.io.BufferedWriter; import java.io.FileReader; import java.io.FileWriter; import java.io.IOException; public class CounterApp private static final String DATA_FILE = "/app/counter.txt"; public static void main(String[] args) int counter = loadCounter(); counter++; saveCounter(counter); System.out.println("Counter: " + counter); private static int loadCounter() try (BufferedReader reader = new BufferedReader(new FileReader(DATA_FILE))) String line = reader.readLine(); if (line != null) return Integer.parseInt(line.trim()); catch (IOException | NumberFormatException e) // Ignore and return 0 if file doesn't exist or is corrupted return 0; private static void saveCounter(int counter) try (BufferedWriter writer = new BufferedWriter(new FileWriter(DATA_FILE))) writer.write(String.valueOf(counter)); catch (IOException e) e.printStackTrace(); - Dockerfile: Create a Dockerfile to build the application.
FROM openjdk:17-jdk-slim WORKDIR /app COPY CounterApp.java . RUN javac CounterApp.java VOLUME /app # Declare the volume CMD ["java", "CounterApp"]
- Build the Docker Image: Build the Docker image using the following command:
docker build -t counter-app .
- Run the Container with a Volume: Run the container, mounting a volume. This example uses a named volume:
docker run -v counter-data:/app counter-app docker run -v counter-data:/app counter-app docker run -v counter-data:/app counter-app
- Verify Data Persistence: Run the container multiple times. The counter should increment each time, demonstrating that the data is being persisted in the volume. Inspect the volume to verify the data. For example, you can use `docker exec` to run a shell inside a temporary container using the same volume to read the contents of `/app/counter.txt`.
docker run -it --rm -v counter-data:/app busybox sh
- Explanation: In this example, the `VOLUME /app` instruction in the Dockerfile declares that the `/app` directory will be a volume. When you run the container with `-v counter-data:/app`, you are mounting a named volume called `counter-data` to the `/app` directory inside the container. The Java application reads and writes to `/app/counter.txt`. Because the volume persists the data, each time you run the container, the counter value is loaded from the volume, incremented, and saved back to the volume.
Even if you stop and remove the container, the counter’s value is preserved in the `counter-data` volume, allowing for data persistence.
Networking and Container Communication

Understanding networking is crucial when working with Docker containers, as it dictates how your containers interact with each other and the outside world. This section explores the mechanisms Docker provides for connecting containers and configuring their network access. Efficient network management is vital for building complex, multi-container applications.
Connecting Containers Together
Docker facilitates container communication through various network types. These networks enable containers to discover and communicate with each other, as well as with external services.
- Bridge Networks: This is the default network. Containers connected to the same bridge network can communicate with each other using their container names or IP addresses. The Docker daemon manages the bridge network, providing isolation between containers and the host machine.
- Host Networks: Containers using the host network share the host machine’s network namespace. They don’t have their own IP addresses, but rather use the host’s IP address and port assignments. This can simplify networking but reduces isolation.
- Overlay Networks: Overlay networks are designed for multi-host networking, enabling containers running on different Docker hosts to communicate with each other. This is especially useful in clustered environments managed by orchestration tools like Docker Swarm or Kubernetes.
- None Networks: Containers on the “none” network have no network access at all. This is useful for applications that don’t require network connectivity.
Using Docker Networks for Inter-Container Communication
Docker networks enable seamless communication between containers. By default, Docker creates a bridge network. You can also create custom networks to provide more control over your container’s network configuration.
Example: Consider a scenario with two Java applications: a web application and a database application. Both applications are containerized.
First, create a custom bridge network:
docker network create my-app-networkThen, run the database container, specifying the network:
docker run --name my-database --network my-app-network -d Next, run the web application container, also specifying the same network and linking to the database container:
docker run --name my-web-app --network my-app-network -p 8080:8080 -d --link my-database: In the web application, you can access the database using the alias. For example, the database connection string might look like this:
jdbc:mysql://my-database:/ This example illustrates how containers within the same network can communicate using their container names or aliases. The --link flag is a legacy feature, and using Docker networks is the recommended approach.
Configuring a Container to Access External Services
Containers often need to access external services, such as databases, APIs, or other applications running outside the Docker environment. Docker provides several ways to configure this access.
- Port Mapping: This is the most common method. When running a container, you can use the
-pflag to map ports on the host machine to ports inside the container. This allows external services to connect to the container through the host’s IP address and the mapped port. - Environment Variables: You can pass environment variables to the container to configure how it connects to external services. These variables can contain hostnames, IP addresses, ports, API keys, and other configuration details.
- Network Configuration: Containers can access external services by their IP addresses if the host machine or the Docker network allows it.
Example: Suppose a Java application running in a container needs to access a REST API hosted at api.example.com on port 8080.
You can configure the application using environment variables:
docker run -e API_URL=http://api.example.com:8080 ... Inside the Java application, you can retrieve the API URL from the environment variable:
String apiUrl = System.getenv("API_URL");The Java application can then use the apiUrl to make HTTP requests to the external API. This approach provides flexibility and allows you to easily change the API endpoint without rebuilding the container image.
Best Practices for Java Containerization

Containerizing Java applications offers numerous benefits, including portability, scalability, and resource efficiency. However, to fully leverage these advantages and ensure a robust and secure deployment, it’s crucial to adhere to established best practices. These practices encompass security, monitoring, and performance optimization, all of which are critical for the successful operation of Java applications within a containerized environment.
Security Best Practices for Containerizing Java Applications
Securing Java applications within containers is paramount to protect against vulnerabilities and ensure data integrity. Implementing robust security measures from the outset is essential for maintaining a resilient and trustworthy system.
- Use Minimal Base Images: Employ minimal base images, such as those based on Alpine Linux, to reduce the attack surface. Smaller images contain fewer packages, which minimizes the potential for vulnerabilities. The smaller the image, the fewer opportunities for attackers.
- Update Regularly: Regularly update the base image and all dependencies within the container to patch known vulnerabilities. Automate this process whenever possible to ensure timely updates. Tools like automated vulnerability scanners and update pipelines can greatly improve the speed and effectiveness of updates.
- Non-Root User: Run the Java application as a non-root user inside the container. This limits the potential damage an attacker can cause if the application is compromised. Define a specific user within the Dockerfile and ensure the application’s files and directories are owned by that user.
- Secure Secrets Management: Never hardcode sensitive information like passwords, API keys, or database connection strings within the Dockerfile or application code. Instead, use environment variables or a secrets management solution like HashiCorp Vault or AWS Secrets Manager to securely inject secrets at runtime.
- Implement Network Policies: Use network policies to restrict container-to-container communication and limit network access. This prevents unauthorized access and limits the blast radius of a security breach. Docker’s built-in networking capabilities, along with third-party solutions, allow for granular control over network traffic.
- Scan for Vulnerabilities: Integrate vulnerability scanning tools into the CI/CD pipeline to identify and address security flaws in the container image before deployment. Tools like Trivy, Clair, and Snyk can automatically scan images for known vulnerabilities.
- Enable Image Signing: Sign container images to verify their authenticity and integrity. This helps prevent the deployment of tampered or malicious images. Docker Content Trust (DCT) provides a mechanism for image signing and verification.
- Regular Security Audits: Conduct regular security audits and penetration testing to identify and address potential vulnerabilities. These audits should cover all aspects of the containerized application, including the base image, dependencies, and application code.
Strategies for Monitoring and Logging Java Applications in Containers
Effective monitoring and logging are crucial for maintaining the health and performance of Java applications running in containers. These practices provide insights into application behavior, enable proactive issue detection, and facilitate efficient troubleshooting.
- Centralized Logging: Implement centralized logging to aggregate logs from all containers into a single location. This simplifies log analysis and makes it easier to identify issues across the entire application. Solutions like the ELK stack (Elasticsearch, Logstash, Kibana) or the EFK stack (Elasticsearch, Fluentd, Kibana) are commonly used.
- Structured Logging: Use structured logging formats like JSON to facilitate parsing and analysis of log data. Structured logs allow for easier querying and filtering of log entries.
- Logging Libraries: Leverage logging libraries such as Log4j or SLF4j in your Java application to control log levels and formats. Configure these libraries to output logs in a structured format and send them to the centralized logging system.
- Health Checks: Implement health checks to monitor the application’s status and availability. Docker provides health check mechanisms that can be used to automatically restart containers that are unhealthy. Define health check endpoints within your application to expose its health status.
- Metrics Collection: Collect application metrics, such as CPU usage, memory consumption, and request latency, to monitor performance and identify bottlenecks. Use monitoring tools like Prometheus and Grafana to collect and visualize these metrics. Consider using a Java agent like Micrometer to expose metrics.
- Tracing: Implement distributed tracing to track requests as they flow through the application’s microservices. This enables you to identify performance bottlenecks and troubleshoot issues in complex distributed systems. Tools like Jaeger and Zipkin can be used for tracing.
- Alerting: Configure alerts based on metrics and log events to notify you of potential issues. Set up alerts for critical events such as errors, high CPU usage, or slow response times. Integrate these alerts with your preferred notification channels (e.g., email, Slack).
- Log Rotation: Implement log rotation to prevent log files from consuming excessive disk space. Configure the logging library to automatically rotate logs based on size or time. Ensure that the rotated logs are also sent to the centralized logging system.
Tips for Optimizing the Performance of Java Applications within Docker
Optimizing the performance of Java applications within Docker is crucial for ensuring responsiveness and efficient resource utilization. Several techniques can be employed to enhance the performance of the application within the containerized environment.
- Choose the Right Java Runtime: Select the appropriate Java runtime environment (JRE) or Java Development Kit (JDK) for your application. Consider using a lightweight JRE like the one based on the Alpine Linux image to minimize image size and startup time.
- Optimize JVM Configuration: Configure the Java Virtual Machine (JVM) parameters to optimize performance. This includes setting the heap size, garbage collection settings, and other JVM options. Use tools like jconsole or VisualVM to monitor JVM performance and tune these parameters.
- Minimize Image Size: Reduce the size of the Docker image to improve startup time and reduce the overhead of pulling the image. Remove unnecessary files, use multi-stage builds, and leverage smaller base images.
- Efficient Resource Allocation: Configure resource limits (CPU and memory) for the container to prevent it from consuming excessive resources and impacting other containers or the host machine. Use the `docker run –cpus` and `docker run –memory` options.
- Connection Pooling: Implement connection pooling for database connections and other resources to reduce the overhead of creating and destroying connections. This improves the application’s responsiveness and reduces resource consumption.
- Caching: Implement caching mechanisms to store frequently accessed data in memory and reduce the need to retrieve it from the database or other external sources. This can significantly improve the application’s performance.
- Code Profiling: Use profiling tools to identify performance bottlenecks in the application code. Analyze CPU usage, memory allocation, and other performance metrics to pinpoint areas for optimization. Tools like JProfiler and YourKit can be used for profiling.
- Application Startup Optimization: Optimize the application’s startup process to reduce the time it takes to become operational. This includes optimizing the initialization of dependencies, reducing the number of components loaded at startup, and leveraging lazy loading where appropriate.
Advanced Topics: Docker Compose and Orchestration
Containerizing Java applications simplifies deployment and scaling. However, managing multiple containers, especially in a production environment, requires more advanced techniques. This section delves into Docker Compose and container orchestration, essential tools for managing complex, multi-container applications.
Docker Compose: Purpose and Benefits
Docker Compose simplifies the definition and management of multi-container Docker applications. It uses a YAML file to configure an application’s services, networks, and volumes. Compose then allows for the creation and management of these services with a single command.The benefits of using Docker Compose include:
- Simplified Configuration: Compose uses a declarative YAML file to define all the services needed for an application. This simplifies the configuration process compared to manually running and linking containers.
- Environment Isolation: Compose creates isolated environments for each application, preventing conflicts between services and dependencies.
- Reproducibility: The Compose file acts as a single source of truth for the application’s configuration, ensuring consistent deployments across different environments (development, testing, production).
- Ease of Use: Compose provides simple commands to start, stop, and manage the entire application stack.
- Orchestration Readiness: Compose files can be easily adapted for use with container orchestration platforms like Kubernetes, facilitating a smooth transition to more complex deployments.
Creating a Docker Compose File for a Multi-Container Java Application
Let’s create a `docker-compose.yml` file for a simple multi-container Java application consisting of a Java backend and a database. This example will use a simple Spring Boot application and a PostgreSQL database.“`yamlversion: “3.9”services: backend: build: ./backend ports:
“8080
8080″ depends_on: – db environment:
SPRING_DATASOURCE_URL=jdbc
postgresql://db:5432/mydatabase
SPRING_DATASOURCE_USERNAME=myuser
SPRING_DATASOURCE_PASSWORD=mypassword
db: image: postgres:15 ports:
“5432
5432″ environment:
POSTGRES_USER=myuser
POSTGRES_PASSWORD=mypassword
POSTGRES_DB=mydatabase
volumes:
db_data
/var/lib/postgresql/datavolumes: db_data:“`Explanation of the file:
- `version: “3.9”`: Specifies the Docker Compose file format version.
- `services:`: Defines the application’s services.
- `backend:`: Defines the Java backend service.
- `build: ./backend` : Specifies the build context, which is the directory containing the `Dockerfile` for the backend application.
- `ports:
-“8080:8080″`: Maps port 8080 on the host machine to port 8080 inside the container. - `depends_on:
-db` : Ensures that the `db` service starts before the `backend` service. - `environment:`: Sets environment variables for the backend application, including database connection details.
- `db:`: Defines the PostgreSQL database service.
- `image: postgres:15` : Uses the official PostgreSQL 15 Docker image.
- `ports:
-“5432:5432″`: Maps port 5432 on the host machine to port 5432 inside the container. - `environment:`: Sets environment variables for the database, including user credentials and database name.
- `volumes:
-db_data:/var/lib/postgresql/data` : Mounts a named volume (`db_data`) to persist the database data.
- `volumes:`: Defines the named volume `db_data` for persisting database data.
To deploy this application, navigate to the directory containing the `docker-compose.yml` file and run the command:“`bashdocker-compose up –build“`This command builds the backend image (if necessary) and starts both the backend and database containers. The `–build` flag ensures that the backend image is built based on the latest changes.
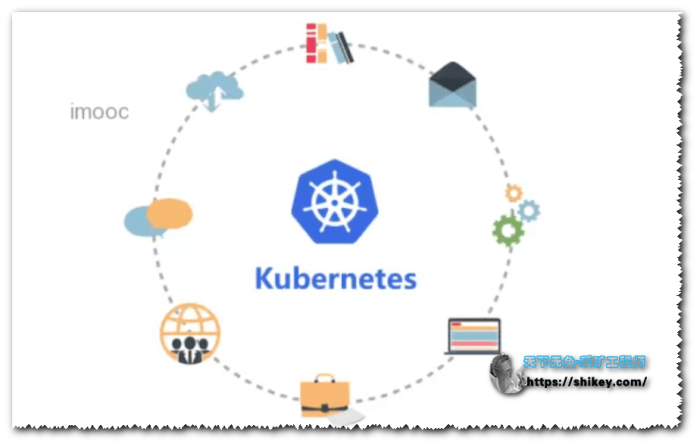
Container Orchestration: Basics of Kubernetes and Docker Swarm
Container orchestration platforms automate the deployment, scaling, and management of containerized applications across a cluster of machines. Kubernetes and Docker Swarm are two popular orchestration tools.
Container orchestration offers several advantages:
- High Availability: Orchestration platforms can automatically restart failed containers and distribute containers across multiple nodes to ensure high availability.
- Scalability: They can automatically scale applications up or down based on resource utilization or demand.
- Resource Management: Orchestration platforms manage the allocation of resources (CPU, memory, etc.) to containers.
- Automated Deployments: They automate the deployment and updates of applications, including rolling updates to minimize downtime.
Let’s briefly examine Kubernetes and Docker Swarm:
- Kubernetes (K8s): Kubernetes is a widely adopted, open-source container orchestration platform. It provides a comprehensive set of features for managing complex deployments. Kubernetes uses a declarative approach, where users define the desired state of their application, and Kubernetes works to achieve that state. It offers features such as:
- Pods: The basic building block of Kubernetes, a pod represents one or more containers that share storage and network resources.
- Deployments: Manage the desired state of pods, including scaling, updates, and rollbacks.
- Services: Provide a stable IP address and DNS name for accessing pods.
- Nodes: The worker machines in a Kubernetes cluster.
Kubernetes is highly flexible and can be used to orchestrate applications across various environments, from local development to cloud platforms. However, it has a steeper learning curve compared to Docker Swarm.
- Docker Swarm: Docker Swarm is Docker’s native container orchestration solution, built directly into the Docker Engine. It provides a simpler and easier-to-use orchestration platform compared to Kubernetes. Swarm focuses on ease of use and integrates seamlessly with Docker’s ecosystem. It offers features such as:
- Services: Define the desired state of a containerized application.
- Tasks: The actual containers running the application’s code.
- Nodes: The worker machines in a Swarm cluster.
Docker Swarm is a good choice for smaller projects or teams that want a simpler orchestration solution. It has a shallower learning curve than Kubernetes, but it offers fewer advanced features and less flexibility. Docker Swarm is often favored for its straightforward integration with the Docker ecosystem.
Final Conclusion
In conclusion, containerizing your Java applications with Docker opens up a world of possibilities for enhanced efficiency, scalability, and portability. From understanding the basics to mastering advanced techniques, this guide has provided you with the tools and knowledge to transform your development and deployment workflows. By embracing Docker, you can ensure your Java applications are not only modern and robust but also future-proof, ready to adapt to the ever-evolving demands of the software landscape.
Helpful Answers
What is the main advantage of using Docker for Java applications?
The primary advantage is the ability to create consistent environments for development, testing, and production, ensuring that your Java application runs the same way everywhere. Docker also provides portability, scalability, and resource efficiency.
How does Docker handle dependencies for Java applications?
Docker uses a Dockerfile to define the application environment, including dependencies. These dependencies are installed within the container during the image build process, ensuring that all required libraries and frameworks are available.
Can I use Docker with my existing Java build tools like Maven or Gradle?
Yes, Docker integrates seamlessly with Maven and Gradle. You can configure these build tools to create Docker images as part of your build process, automating the creation and deployment of your application containers.
What are volumes in Docker, and why are they important for Java applications?
Volumes are directories within one or more containers that are specially designated to bypass the Union File System. Volumes provide persistent storage for data, allowing you to store data independently of the container’s lifecycle. This is crucial for Java applications that need to persist data, such as databases or configuration files.
What is Docker Compose, and how does it simplify the deployment of Java applications?
Docker Compose is a tool for defining and running multi-container Docker applications. It simplifies the deployment of complex Java applications by allowing you to define all the services and their configurations in a single YAML file. This makes it easy to manage and orchestrate multiple containers, such as a Java application, a database, and a web server.